Many newbies are struggling to connect laptops to HDMI projectors. Are you looking for the easiest and fastest way to do it?
If the answer is yes, check out the detailed instruction in the article below. I will give you specific steps on how to connect a laptop to a projector with HDMI.
Also, you will have more tips for connecting to HDMI. Dig into it now for details!
Table of Contents
How To Connect A Laptop To A Projector With HDMI?

To help you clearly define each step, I will break down the specifics below:
- First, plug the power cord into the wall. The goal is to pre-boot your devices. Note that you do not disconnect the power supply at this stage.
- Next, press the power button on your home TV. If your case is an iPhone projector, try to do an extra step to set up the function. Specifically, go to the settings section and select the process to use for the laptop.
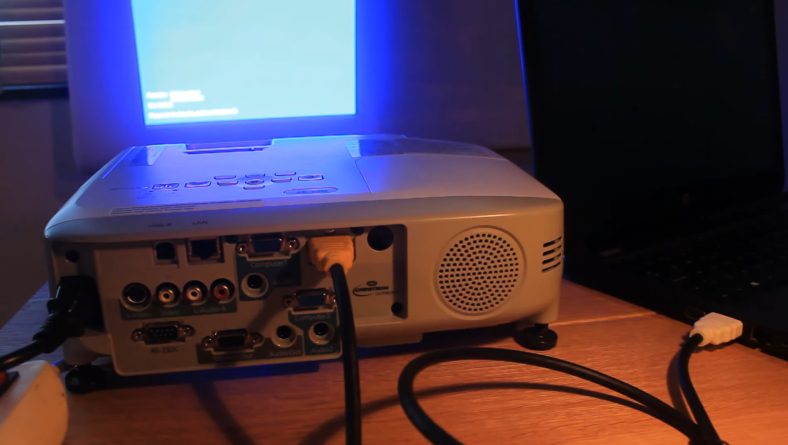
- Then we come to the most important step – connecting the cables. At this point, connect the cable and the laptop’s HDMI port. In addition, the end of the public line should be into the receiver of the LCD projector.
- Attention, please check carefully at the connection locations. Please assure me that everything is very secure.
Your test tip is to hold the shaky end of the cable to see if everything is in place. If you don’t feel a lot of movement, you have succeeded in this step.
- Now turn on your laptop. At this point, the computer screen is on your projector. It’s your job to enjoy everything from your projector.
Each device has its unique characteristics. Different brands will have other installation methods. It all depends on the type of projector and your laptop.
Before buying a cable, determine what kind of port your laptop has. Thereby, you will be able to limit the risk of damaging your device.
Related:
– Projectors: Short Throw vs. Long Throw
– Do projectors and Google Chromecast work together?
Some Useful Tips
In addition to the specific steps above, I will give you more tips for connecting with different devices. This section is very helpful for you.
For Windows 7 & 8
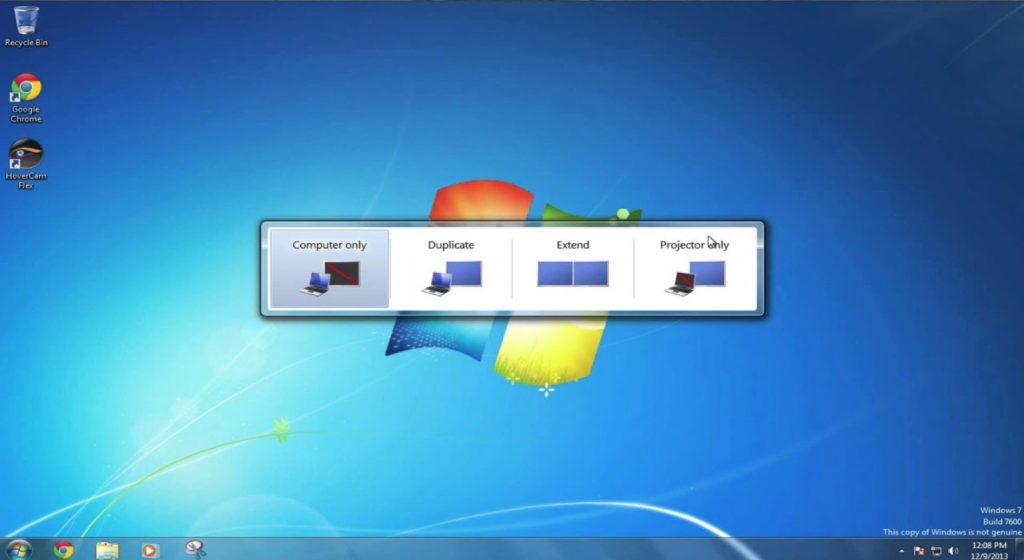
First, I will introduce you to projector interaction tips for windows 7 and 8 operating systems:
- You choose to go to the settings of the device.
- Here, find and hold the “window” button.
- Next, you click on the “P” icon. Note that you should keep the “window” button as before.
- At this point, the cloned interface will appear for you. Your task is to select “Clone” to project the image from your laptop.
Alternatively, you can also choose an alternative option like “Extend.”
The purpose is to use my projector as a second laptop screen. So, you don’t have to buy a different computer.
Once everything is done, stop clicking “Windows” and check out of the library.
Related:
– Do projectors work well for gaming?
– What is the bulb life for projectors?
For Windows 10
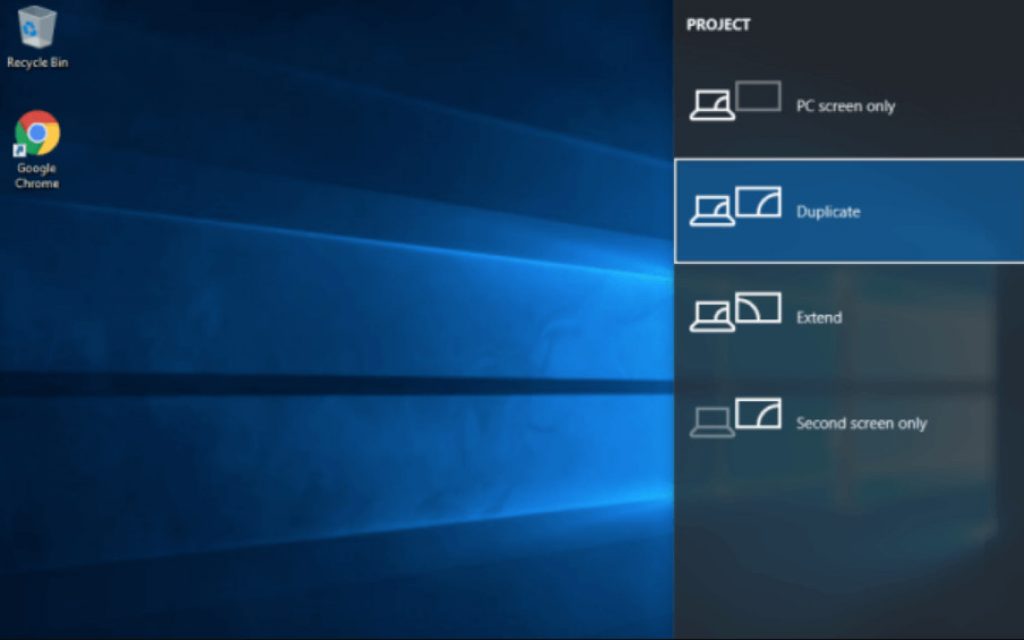
As for the Windows 10 interface, things are a lot easier. You need to do it in the following order:
- First, you select the “Graphic Properties” icon.
- When the new interface appears, select the “Display” box.
- Here, you continue to choose the “Resolution” section. Now you can manually adjust the screen resolution you want.
- Finally, don’t forget to save your settings.
Overall, operations on Windows 10 are easy because you do not need to have specialized knowledge. Just rely on the instructions and follow each step; you will be successful.
For Windows XP
Next, I will give you some tips for Windows XP. Before connecting, please start the computer first. When everything is ready, click anywhere on the screen. Accordingly, you, in turn, choose the following settings:
- Graphics options
- Export to
- Intel Dual Monitor Clone
- Monitor + Laptop
- After the steps, you have finished coming to the machine screen. Now you can enjoy beautiful movies and pictures through the projector’s interface.
FAQs
Why does my laptop not display on projectors?
Don’t worry if you are getting this error because failure to display is extremely common. Surely, anyone has encountered it once. The specific cause of the projectors not coming to the screen could be the video output.
To fix this situation, change the video output display item. You need to remove all output settings and reconnect everything.
Attention, please prioritize checking the screen first. If you discover damage, then you must change your screen immediately.
Why won’t my HDMI work on my projectors?
In theory, there are many reasons why your HDMI won’t work on the projectors. Here are the basic reasons:
- You plugged it in the wrong way on either end. This case is very common. To fix it, you need to change the end of the cable.
- The second cause is a damaged port of the projectors. Usually, this situation often occurs on older devices.
- The port on your streaming device is that your transmitter is still likely to fail the HDMI end, just like the projector. Repair or replace your transmitter.
- The last is an incorrect input error on settings. Please check your input. For ease, you can refer to the video tutorials.
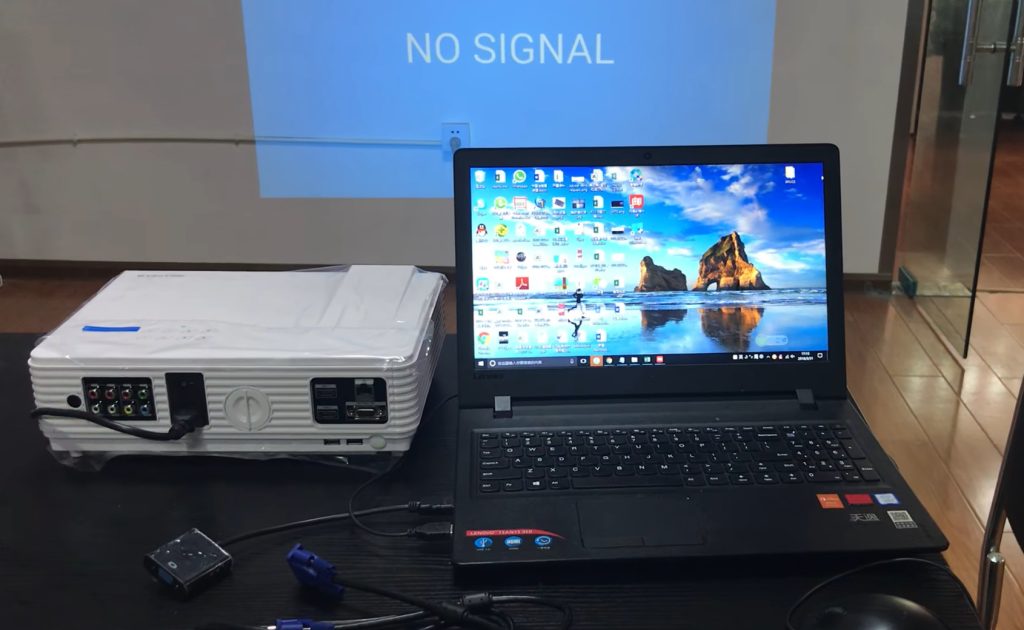
Why is there no HDMI signal?
According to many experts, most of this cause lies in connection errors or damaged cables. You can change and repair the cable for your device.
Please turn on the devices related to the TV connection error. Then disconnect the HDMI port from one of them and then reconnect it.
In case your TV supports advanced formats and 4k sources, you should do an extra step in enhancing the input for HDMI. Accordingly, you will reduce the signal difference.
Conclusion
Now, do you have an answer to the technical error you’re having?
I hope you can find the best solutions for your HDMI error through this article. If you follow my instructions strictly, you will surely succeed in fixing the problem.
Do not forget to share the article with many people so that everyone can refer to this useful knowledge. Finally, you can leave your questions below in the comments section. I will try to answer you as soon as possible.